
Replacing binocular eyecups is a straightforward process that can improve comfort, protect your lenses, and restore image clarity. Damaged eyecups often lead to discomfort, reduced field of view, and potential damage to your lenses. Here’s what you need to know:
- Why Replace Eyecups?
Worn or broken eyecups affect viewing quality, eye relief, and lens protection. They can allow dust or moisture to reach the lenses, ruining delicate coatings. - Signs of Damage:
Torn rubber, grinding noises, or misaligned eyecups are common issues. These can cause discomfort, blackouts, or reduced field of view. - Tools Needed:
Replacement eyecups (specific to your model), a small Phillips screwdriver, adhesive (like contact cement), and cleaning supplies (microfiber cloth, isopropyl alcohol). - Basic Process:
- Remove old eyecups carefully based on your model (twist, pull, or unscrew).
- Clean the area thoroughly to remove debris or adhesive.
- Attach new eyecups, ensuring proper alignment.
- Test for smooth movement and proper eye relief.
- Model-Specific Tips:
- Nikon Monarch ATB: Use reverse threading; avoid over-tightening.
- Swarovski EL: Unscrew metal rings; ensure compatibility with your binocular generation.
- Leica Geovid R: Pull eyecups straight out and align carefully during reinstallation.
Proper maintenance and timely replacement of eyecups can extend the lifespan of your binoculars and ensure a better viewing experience. Always refer to your binocular manual for specific instructions.
How to easily remove eyecups on Leica’s Geovid R rangefinding binocular
Why Replace Binocular Eyecups
Eyecups play a crucial role in ensuring a comfortable and effective viewing experience. They help maintain the ideal eye relief, provide cushioning for your eyes and brows, and block out peripheral distractions, all while protecting your lenses from damage. When eyecups fail to perform these tasks, the quality of your viewing experience takes a hit.
Damaged eyecups, whether from torn rubber or faulty click-stop mechanisms, can leave your lenses exposed and disrupt their proper function. Simon Cuthbert, Founder of Target Tamers, puts it succinctly:
"Eyecups are used for two reasons: to provide comfort around the eyes and brows and to enable both glasses‐wearers and non‑glasses wearers to reach the ideal amount of eye relief".
Without properly functioning eyecups, achieving the recommended 16–18 mm of eye relief for a full-field view becomes nearly impossible.
Sometimes, the damage isn’t immediately obvious. A grinding noise when adjusting the eyecups could signal debris or a problem with the eyepiece holder. Small cracks, while seemingly minor, can distort your view and allow moisture to harm the lens coatings. Unfortunately, many users continue to use degraded eyecups, unknowingly compromising their viewing experience.
Replacing worn-out eyecups can make a world of difference. It restores the protective barrier that shields your lenses from scratches and eliminates issues like dark semicircles, double images, and eye strain caused by improper eye positioning. In short, new eyecups bring back optimal optical performance and ensure your lenses stay protected.
Tools and Materials Needed
Before diving into the process, make sure you have everything you need. The right tools and materials will make the job easier and help protect your binoculars from accidental damage.
Compatible Replacement Eyecups
It’s crucial to use replacement eyecups designed for your specific binocular model. For example, Nikon Monarch ATB owners should reach out to authorized Nikon agents, as replacement sets usually cost around $38 USD (about NZD $50.00). If you own Nikon 8×30 E2 or Nikon SE (8×32/10×42) binoculars, the Nikon 326B eyecup is compatible with both models. However, note that it’s about 2.5mm shorter than the original SE eyecups and typically costs about $9.99 each on eBay.
The way eyecups attach can vary depending on the brand. For instance:
- Swarovski eyecups usually unscrew for removal.
- Some Leica models have eyecups that pull straight out.
- Nikon Monarch HG eyecups are glued to plastic barrels, requiring you to peel back the rubber to access the retention screws underneath.
Before buying replacements, check how your eyecups are attached – whether they’re threaded, friction-fit, or secured with internal screws.
Additional Tools
You’ll need a few basic tools to replace the eyecups safely:
- A small Phillips head screwdriver is essential for removing the screws that hold the plastic barrels to the eyepiece housings.
- A small container or tray is handy for keeping track of tiny screws and detent pads. As John A Roberts from BirdForum advises:
"Work over a tray to capture the VERY small screws & detent pads."
For reattaching rubber eyecups to the plastic barrels, you’ll need contact cement or rubber cement. If the twist mechanisms feel stiff, apply a bit of silicone grease, Vaseline, or a lanolin-based product. Borja from Nature’s Pic Images Blog shares:
"I have restored them to fully operational state just lubing the rollers with a bit of vaseline grease. Now they are smoother than they ever were."
Cleaning Supplies
Before replacing the eyecups, clean the binocular body and eyepiece thoroughly. Here’s what you’ll need:
- Microfiber cloths and 90+% isopropyl alcohol to wipe away adhesive residue and tough dirt.
- A soft-bristled toothbrush to scrub away stubborn debris.
- Compressed air or a lens brush to clear loose particles before wiping.
If your binoculars have been exposed to sand or salt, and they’re waterproof, rinse them under warm running water while moving the eyecups to flush out debris. Always spray cleaning solutions onto a cloth – not directly onto the binoculars – to prevent liquid from seeping into the internal optics.
Once you’ve gathered your tools and cleaned your binoculars, you’re ready to move on to the step-by-step instructions for replacing the eyecups.
sbb-itb-31b92c7
Step-by-Step Instructions for Replacing Eyecups
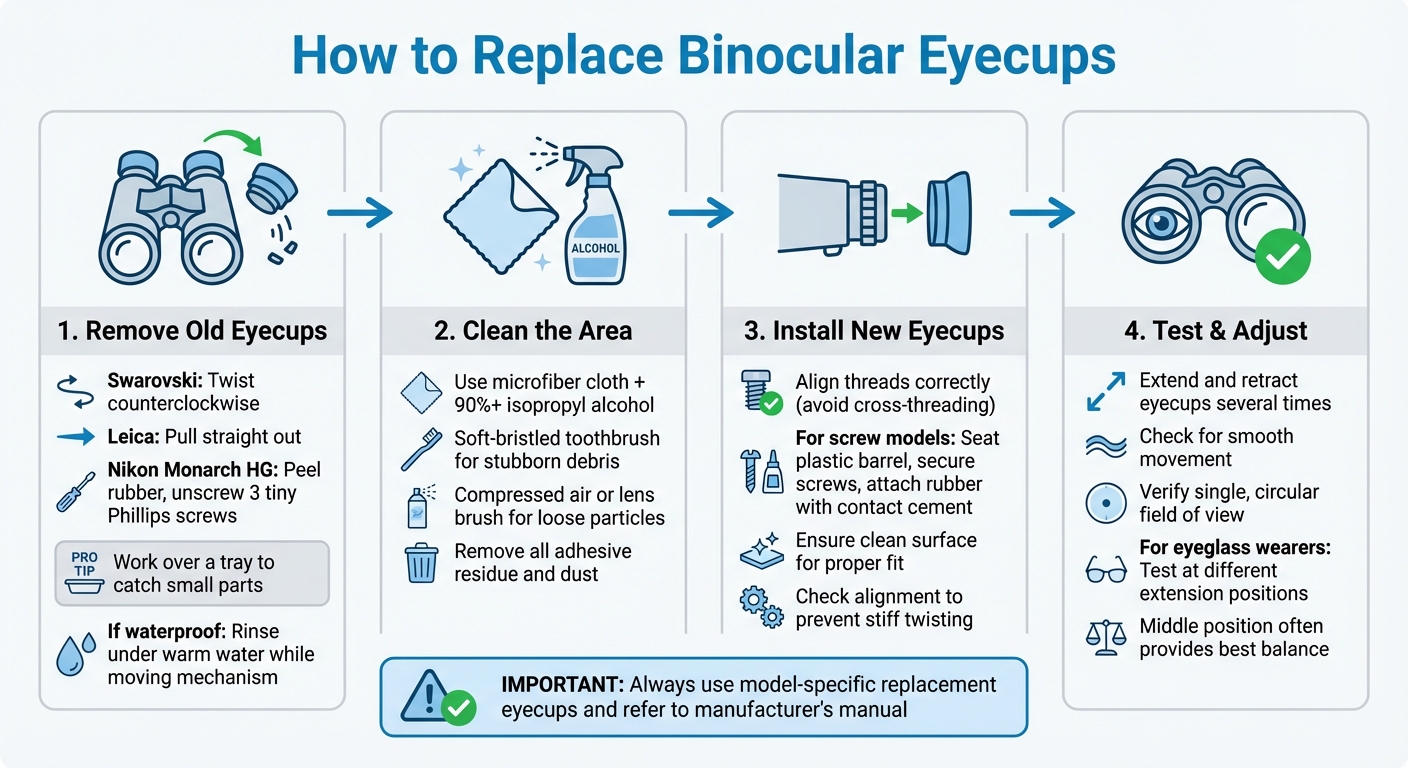
4-Step Process to Replace Binocular Eyecups
Removing the Old Eyecups
The process for removing eyecups depends on your binocular model. For Swarovski binoculars, the eyecups simply unscrew – just twist them counterclockwise until they come off. Leica models are even more straightforward: extend the eyecup to its maximum position and pull it straight out. For Nikon Monarch HG, the process is more intricate. John A Roberts from BirdForum describes it like this:
"The rubber cups are glued to the underlying plastic barrels. Carefully peel the cups off. Then you can access the 3 TINY phillips head screws that retain the plastic barrels to the ocular housings."
If your binoculars are waterproof, rinse them under warm water while moving the eyecup mechanism back and forth. This helps remove sand or grit that could scratch the housing during disassembly. For models with hidden screws, a precision Phillips screwdriver (like those in eyeglass repair kits) is essential. Always work over a tray or similar surface – those tiny screws and detent pads are easy to misplace.
Once the old eyecups are removed and the area is clean, you’re ready to install the new ones.
Installing New Eyecups
When attaching screw-on eyecups, make sure the threads are aligned correctly to avoid cross-threading. For models like the Nikon Monarch HG, seat the plastic barrel first, secure it with the three screws, and then reattach the rubber cover with contact cement.
A clean surface is essential for a proper fit. Any leftover adhesive or debris can prevent the eyecup from sitting correctly, causing it to appear crooked or uneven. For twist-style mechanisms, ensure all components are properly aligned during reassembly. Misalignment can make the twisting action feel stiff or irregular.
After installation, test the eyecups to confirm everything is working as it should.
Final Adjustments
Extend and retract the eyecups several times to ensure smooth movement. They should align perfectly and provide an unobstructed view. Check that both eyepieces create a single, circular field of view when you flex the central hinge. If you notice "blackouts" or restricted areas in your view, the eyecups may not be properly seated.
For eyeglass wearers, retract the eyecups fully and compare your field of view to what you see with the eyecups extended (without glasses). Keep in mind, fully extended eyecups can reduce your field of view by up to 20%. Most users find that the middle extension position strikes the right balance, offering enough eye relief while also blocking peripheral light.
Model-Specific Tips and Considerations
Different binocular models come with unique quirks and maintenance needs. Here’s a closer look at tips for handling Nikon, Swarovski, and Leica systems.
Nikon Monarch ATB
The Nikon Monarch ATB binoculars have a distinctive design feature: reverse threading. To remove the eyecup unit, you’ll need to turn it clockwise, and to reinstall, turn it counter-clockwise. Be gentle and precise during this process to avoid damaging the components.
A common issue with this model is the thin plastic base ring holding the eyecups. As Rob Suisted, a natural stock photographer, points out:
"The thin plastic ring holding the eyecups eventually fails on Nikon Monarch Binos. A known weakness that is easily fixed though".
When installing a new unit, tighten it just enough to keep it secure during use, but avoid over-tightening. Newer replacement parts for the Monarch ATB feature small metal rollers instead of the older ball bearings. To ensure smooth operation, particularly in damp or marine environments, apply a light layer of lanolin grease or vaseline to the rollers. Reflecting on his repair, user Borja shared:
"I have restored them to fully operational state just lubing the rollers with a bit of vaseline grease. Now they are smoother than they ever were".
For added convenience, work over a light-colored surface to easily spot any small components that might drop during the repair.
Swarovski EL/Habicht
For Swarovski EL models, removing the eyecups is straightforward. Grip the metal ring (not just the rubber) and turn it counter-clockwise to detach the old cup. When installing new eyecups, thread them clockwise until they sit flush, then secure them firmly.
Keep in mind that compatibility varies between generations of EL binoculars. For instance, an EL 8.5×42 SV Gen II requires different eyecups compared to an EL 8.5×42 W B Pro Gen III. Replacement eyecups are typically sold individually, costing about $45.00 each, so make sure to order two if you need a complete set.
In contrast, Habicht models are more straightforward. Their eyepiece threads have remained consistent since 1948, making replacements much simpler.
Leica Geovid R
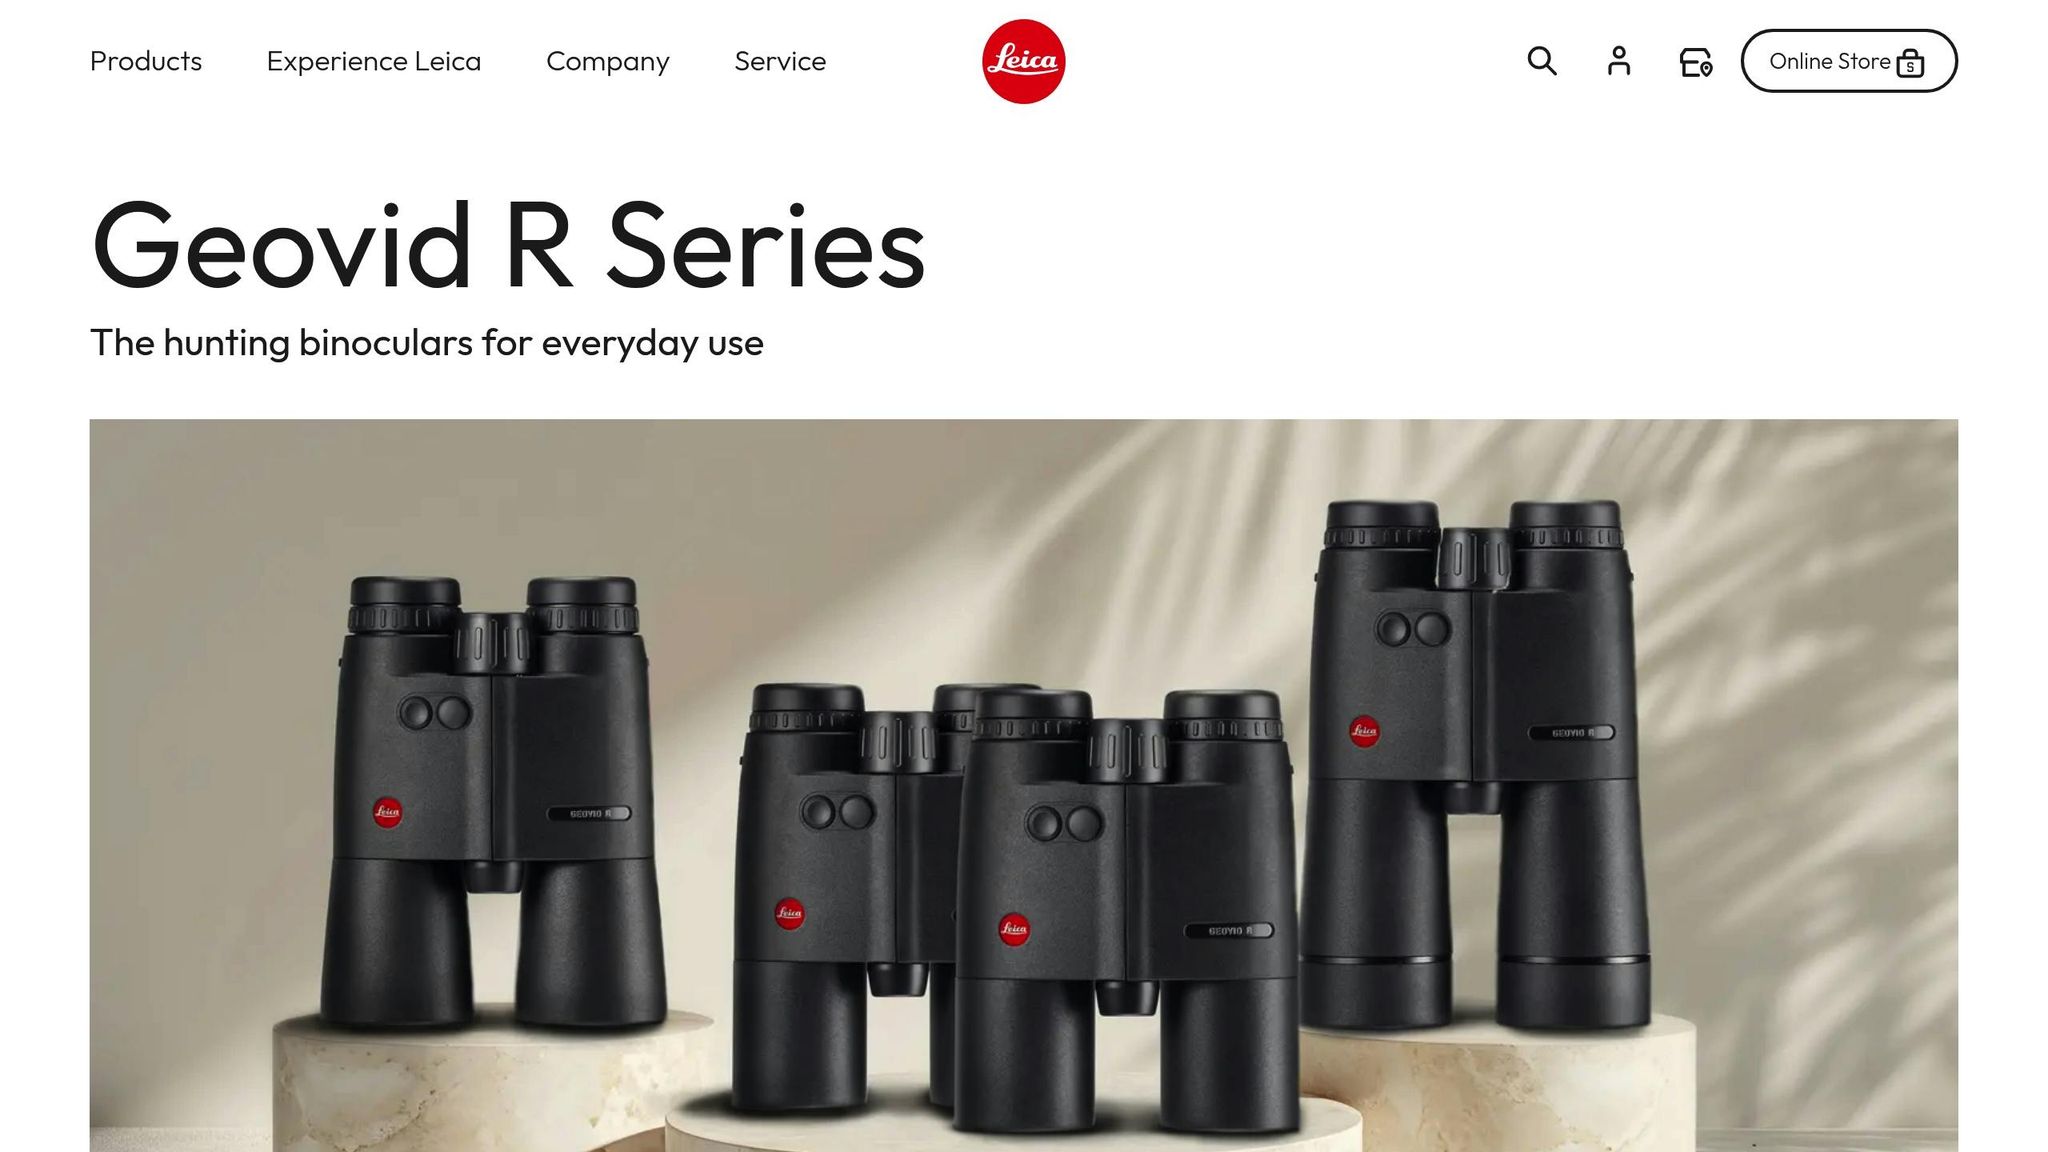
When dealing with the Leica Geovid R, fully extend the eyecups and pull them straight out for easier removal. This technique reduces the risk of damaging the mechanism. When reinstalling, ensure the eyecups are properly aligned before pushing them back into place. Misalignment can make the twisting action stiff or uneven.
If you need to access internal components, use precision screwdrivers to avoid stripping screws. Additionally, keep moisture away from the binocular body during the process to prevent internal fogging. For cleaning, remove dust with compressed air or a soft brush to avoid scratching the lenses.
Conclusion
Replacing binocular eyecups can bring back both comfort and optimal optical performance. As discussed earlier, the process requires careful attention to detail. Work in a clean, well-lit area, gently remove the old eyecups – whether by twisting or pulling, depending on your model – and ensure all surfaces are free of dust or debris before installing the new ones. Avoid forcing any parts to ensure a smooth replacement process.
Using the right tools and replacement parts is essential to protect your binoculars. As birdwatching experts Michael and Diane Porter caution:
"More binoculars have been ruined by improper cleaning than by being dropped."
Having precision screwdrivers, microfiber cloths, and replacement eyecups designed for your specific model can help you avoid damaging delicate lens coatings or internal components.
Timely eyecup replacement not only safeguards image quality but also extends the lifespan of your binoculars. Regular maintenance prevents dust buildup and preserves the integrity of the lenses. Considering that about 90% of binocular owners are unaware of how to properly adjust their optics, dedicating time to maintain and replace eyecups ensures your equipment stays in top condition.
Always refer to your manufacturer’s manual for guidance tailored to your binocular model. As Douglas Morales from Outdoorsmans notes:
"Keeping them properly cleaned will extend their life and performance."
Follow the instructions carefully, and avoid tampering with parts that aren’t meant for user servicing. Doing so can void warranties or compromise the waterproofing of your binoculars. A little patience and attention to detail will have your binoculars ready for your next outdoor adventure in no time.
FAQs
How do I know if my binocular eyecups need to be replaced?
If your binocular eyecups are showing signs of wear – like cracks, tears, or becoming loose – it might be time to replace them. You might also notice they’re not sealing properly, feel uncomfortable during use, or fail to stay in position when adjusted. Checking your binoculars regularly can help you catch these problems early.
Eyecups in good condition are key to a comfortable viewing experience and help protect your lenses from dust and debris. If any of these issues come up, replacing the eyecups can help preserve both the performance and lifespan of your binoculars.
What can I do if the replacement eyecups don’t fit my binoculars?
If your new eyecups aren’t fitting as they should, start by double-checking that they’re the right size and designed for your specific binocular model. Refer to the manufacturer’s instructions to ensure proper installation, and make sure the eyecups are firmly attached without applying excessive force.
If the fit is still off, try collapsing the eyecups to their shortest setting while keeping the internal components steady. In cases where the replacement eyecups don’t match your binoculars, you might need to look for replacements specifically made for your model. Avoid using adhesives or making modifications unless the manufacturer explicitly advises it – this can help you avoid damaging your binoculars.
For additional help, reach out to the manufacturer’s customer service team or explore expert resources, like the guides on Scope It Outdoors, for more tips on maintaining and accessorizing your binoculars.
What are the best ways to clean and maintain binocular eyecups?
To keep your binocular eyecups in top shape, start by clearing away loose dust with a soft brush or compressed air. For a more thorough clean, lightly wipe the eyecups with a damp, lint-free cloth. Steer clear of harsh chemicals or abrasive tools, as they could harm the material.
By regularly cleaning and checking your eyecups, you’ll ensure they remain comfortable and functional. These small maintenance steps can go a long way in prolonging the life of your binoculars, keeping them ready for all your adventures!